Set Up Multi-Language Credentials
This section explains how to add a new language — in this example, Spanish — to the CoA (Certificate of Attendance) template. By enabling multiple languages, you can issue credentials that display information in the appropriate language for each recipient.
1. Adding languages
Languages can be added in two ways: by setting Default Languages for Credentials or by configuring languages for a specific template in Customise Template.
1.1 Default Languages
A single credential can be issued in multiple languages. Default languages act as a preselection whenever a new template is created, ensuring convenience when issuing credentials in the same languages repeatedly.
To update default languages, navigate to System Settings → Default Languages for Credentials section. Here, you can see which languages are currently active. The first language in the list is considered primary and will be used as the default in the Customise Template section. When multiple languages are available, the order determines how credentials will be processed and delivered.
To add a new language, such as Spanish, open the Choose Language dropdown and select the desired language, then click Add New. Languages can be removed using the Trash bin icon.
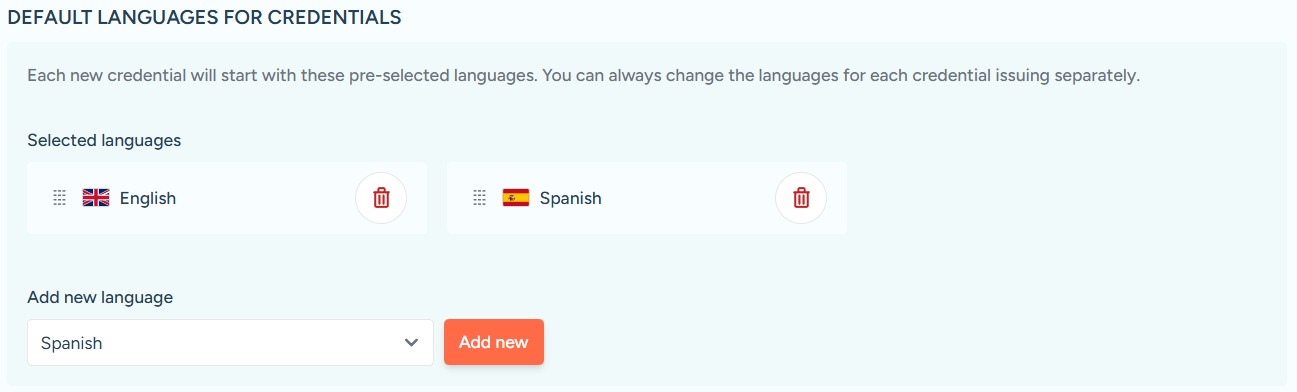
Spanish added to Default Languages for Credentials.
1.2 Configuring Languages in Customise Template
If you prefer not to modify default languages, you can set languages for a specific credential template. Navigate to Issue Credentials, select the template (e.g., CoA), and click Use Template. At the top of the page, click Configure Languages to open the language settings modal.
The modal works similarly to the default languages settings, allowing you to add or remove languages and reorder them as needed. Country flags next to the Configure Languages button provide visual feedback on which languages are active. Once your changes are complete, click Done to save.

Configure Languages button in Customise Template.
2. Setting Up Translatable Fields
Some fields on the credential can be translated while others remain fixed. To manage this, click the Manage Fields button next to Configure Languages. This opens a modal that allows you to select whether each field should be translatable or static.
The modal also provides a Restore Default Settings option to revert changes to template defaults. Once you have configured the fields, click Done to save your changes.
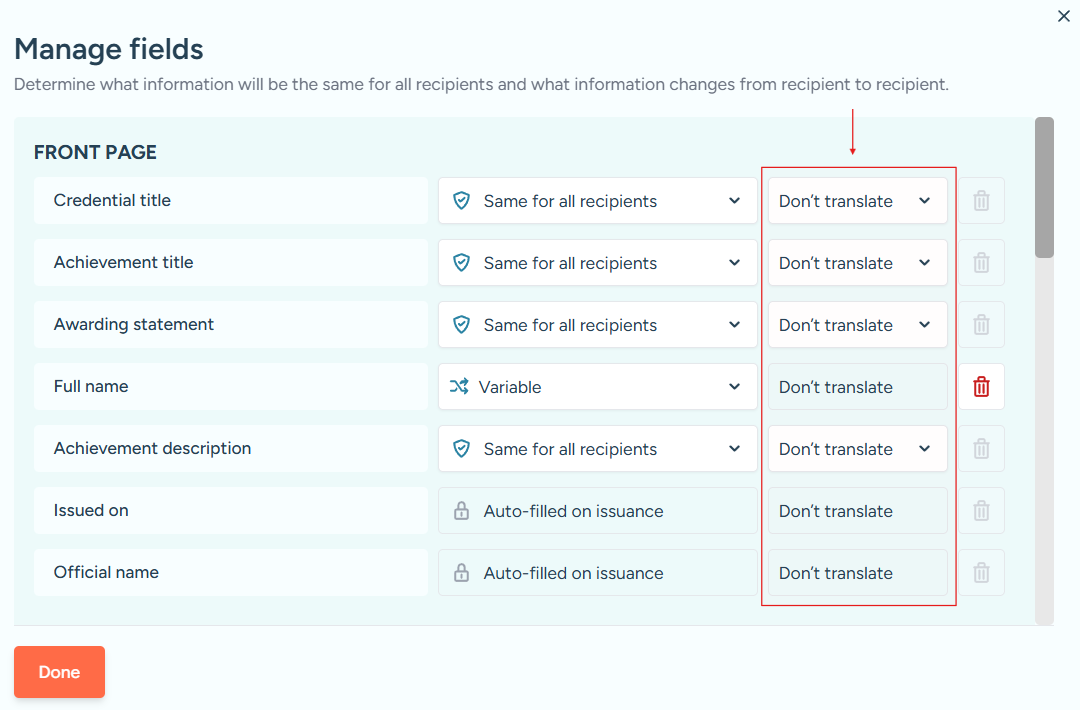
Translate / Don’t Translate options highlighted in the Manage Fields modal.
3. Translating Content
Within Customise Template, fields marked for translation are indicated by flags. A grayed-out flag signifies that the translation is empty and requires attention. All fields marked for translation must be completed before proceeding to issue the credential.
Clicking a flag opens the Translate Fields modal, where you can enter content in the target language. Navigation buttons such as Previous Field and Next Field help move efficiently between fields. Once translations are complete, click Done to save.
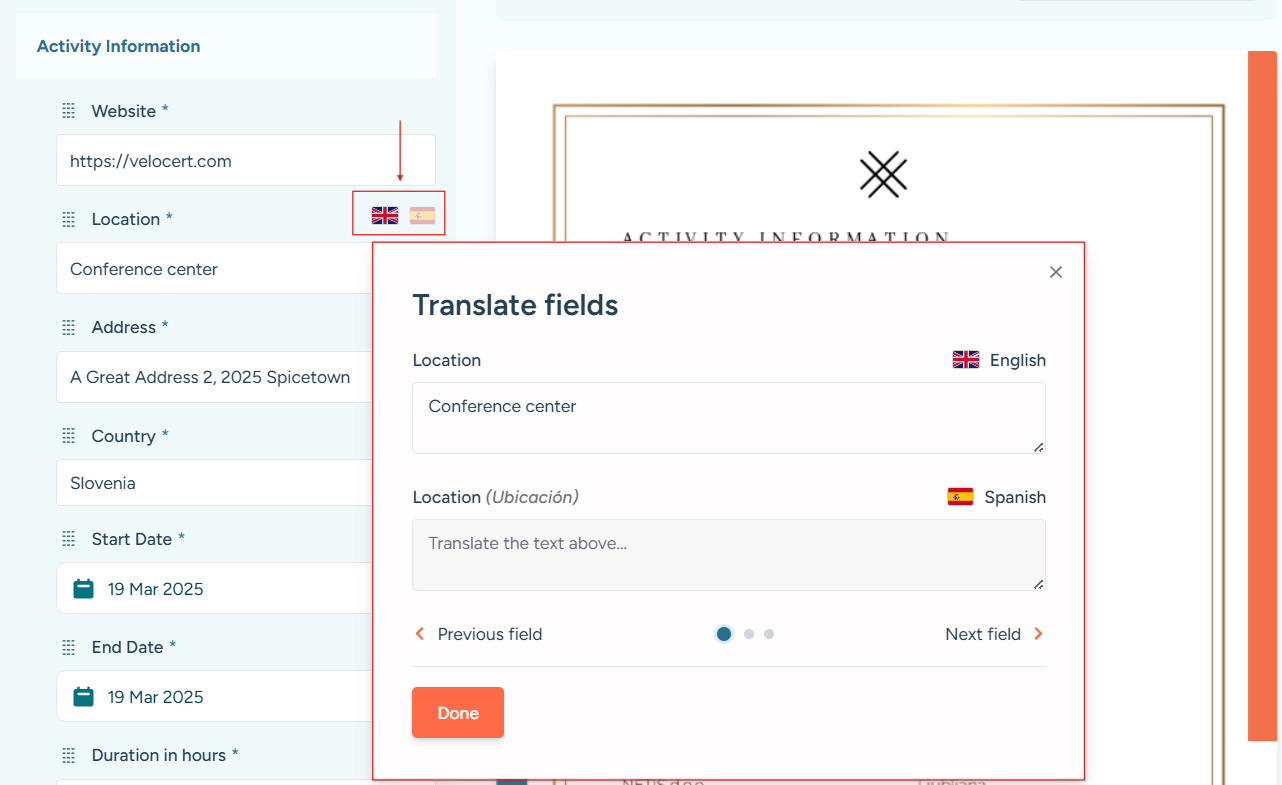
Opened Translate Fields modal from a field’s language flag.
4. Previewing Credentials in Multiple Languages
To verify how a credential will appear in each language, click Preview Certificates at the top of the page. In the Preview Certificate modal, select a language to view the credential in that language. You can also navigate between pages using the arrows on either side of the preview. This ensures that all translations are displayed correctly before credentials are issued.
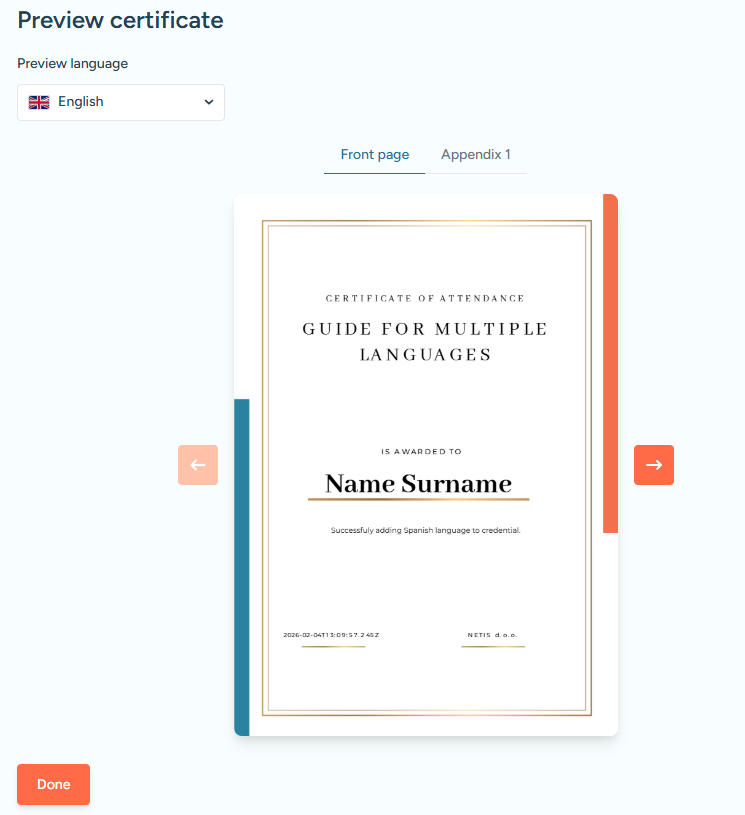
Credential preview modal showing how the certificate appears in the selected language.
By following these steps, you can confidently add new languages to your credentials and configure which fields are translatable. This approach ensures that your credentials remain accurate, professional, and personalised for recipients across different languages.